Feeds:
Posts
Comments

I know I promised a post yesterday. I am sorry I break promises. Life happens, yunno? But I am here today, even though I wish to be far from here. Not saying I don’t like it here. I do. I really do, but today is a special today. Today is my dad’s birthday. Even though I had hope he would live to see this day, I didn’t think he would. But he did. Barely. He is holding on by a thread. I wish I could be there today to celebrate, but with work and gas being the way it is… it is hard to go up there every week. I wish I could, but I was there last week… and it is getting close to the end of the month. But I hope he feels my love. I hope he understands that he is the most important person in the world to me. I celebrated (kind of) last week when I was up there with him. I baked him an apple pie that he slept through and never ate, but I talked to him. I told him all the things I had been dying to say. I told him how proud of him I am, for fighting and holding on for so long. I prayed for him and wished there was some way I could take his pain away. Why must he suffer? I hope today he found some relief on his birthday.  Not only has he survived another year, but it has almost been a year since he was first diagnosed with cancer. Has a year really almost gone by? In October, he first showed the symptoms. In the beginning of November, he was diagnosed.

A year. It flies by so fast.

Autumn is here and I know in a blink of an eye, it will be snowing. I know people will groan and sputter at that statement… but it is just the fact of life. But Fall is gorgeous. Trees have been starting to change since the end of August, but now it is becoming more frequent. More beautiful.

I also happen to be a huge fan of the flavors Fall brings with them. Apple. Maple. Pumpkin. Currently, I have made an Apple Pie. Caramel Apple Cupcakes (with homemade caramel that came out a lot harder than I wanted it too. Bad Caramel, but very tasty… just not for a frosting…). Pumpkin Cheesecake. And Pumpkin Chocolate Chip Cookies.

I love Pumpkin Chocolate Chip Cookies.


Oh and the pumpkin cheesecake.

But I forgot to get pictures of the pumpkin cheesecake.

For some reason, cheesecake just happens to get eaten before pictures can be taken. I just do not know what is up with that.


Pumpkin Chocolate Chip Cookies are pretty easy. And delicious. And something about them… it is like a cookie and a cake had a wonderful pumpkiny baby. And it was good.

Pumpkin Chocolate Chip Cookies

3 Cups Flour

1 teaspoon baking soda

1 teaspoon baking powder

1/4 teaspoon pumpkin pie spice

1/2 teaspoon cinnamon

1/4 teaspoon nutmeg

1/4 teaspoon salt

1 cup (2 sticks) butter, softened

1 cup granulated sugar

1 cup brown sugar

2 eggs

1 teaspoon vanilla extract

1 cup (or about half of a 15oz can) of pumpkin puree

Directions

1. Preheat oven to 350

2. Mix together the flour, baking soda, baking powder, pumpkin pie spice, cinnamon, nutmeg and salt on wax paper or in a medium bowl.

3. Beat butter until smooth, slowly add the granulated sugar. Push down the sides with a spatula. Add the brown sugar and mix thoroughly. Add eggs one at a time, beating well after each egg. Add in the vanilla and pumpkin. Mix well.

4. Slowly add in the flour mixture while mixer is on low. Mix until altogether. Do not over beat.

5. Scoop the dough with a large spoon (about a tablespoon) and place on non-stick cookie sheets (spray your cookie sheets with cooking spray or line with parchment paper if you have to.

6. Bake for 15-20 minutes or until edges are golden brown.

7. Let cool on baking sheets for about 5-10 minutes before removing onto a cooling rack. If you handle sooner, they have a tendency to break!

8 Enjoy with a tall glass of milk.

Happy Birthday, Dad. I raise my glass of milk to you. I love you, and I hope you can someday soon escape the horrible pain you are in.

This one is for you.

Bustin’ Out: Not Sim Style

All my life I have been living in a box.


It was safe. It was comfortable. I got out of bed in the morning. I drank my coffee. Ate some breakfast. And normally did close to the same thing almost every day. It was routine. It was safe.

And then I fell in love.

With Baking. And it helped me break out of that comfort zone.

I have made cheesecake.

Homemade Apple Pie with a Double Crust.

And created a whoopie pie filling I love (finally!).

Baking has opened doors for me and helped me be more creative. It has given me passion and also a distraction during these uncertain times.

What inspires you?

What makes you feel alive?

A Beautiful Sunset right before a storm?

Nature’s majestic but mighty beauty?

Or… being surrounded by wonderful people who inspire and strengthen you?

Sorry, no recipe this time around! Just a little inspiration to start off your weekend. I am going to be baking for most of it. 2nd Monthly Taste Testing begins on6pm this Sunday! I am going to be creating Pumpkin Cheesecake Cupcakes, Caramel Apple Cupcakes, Pumpkin Chocolate Chip Cookies, Apple Crisp Pie. Which recipe would you like to see first?

Have a wonderful weekend everyone! Next post… Monday! Promise it won’t be so late (Oh and all pictures above were taken by me or the fiance and taken in the beautiful landscape of Maine).

Birthday Wishes and Cake…

I have a lot to be thankful for. I have two wonderful kitties who cuddle and snuggle and actually like us and not always just because we feed them. I have a horse who gives me unconditional love and lets me hug her when I need some silent comfort. I have a handsome fiance who supports my passions and helps me be more open minded. I have a KitchenAid mixer from my parents which makes baking so much easier. And because of said KitchenAid mixers, I was able to make delicious Portal cupcakes that won over my first wedding couple and help me launch forward towards my dreams. What are Portal cupcakes you ask? Well, you see it all started with a video game. And I think while you read this blog post you should also be listening to this. Ok, that’s better. So in this game there is a cake. Well maybe there isn’t a cake. You know I am not quite sure what the story is with the cake because I never played the game. And there is something about the cake being a lie? I am not quite sure. But anyway, I was approached by this couple that they wanted this cake at their wedding. 120 times. In cupcake form. I was about to turn that lie into truth. And on Sunday, they came to see the creation and by the mmm’s and ahh’s, I can only assume they liked it. And the fact that they were ready to hire me right then and there. That made me feel very happy. Oh you want to know what these lying cakes look like? Oh I suppose I can give you a visual.

Everything was completely homemade. And yes I made three different types. One with cherries on top and also a cherry frosting filling. One with just cherries on top. And then one with M&Ms, which gave the more authentic look that they wanted. They decided to go with a combination of the cherry filling and also the M&Ms. I am so excited to get to work on this. Can it be June yet? Just skip over winter. (though I am excited for all the baking possibilities this winter… oh darn it. I guess I will just have to be patient!).

Yes, I have a lot to be thankful for. Sushi. Cookies. Cupcakes. Friends. In 22 years, I feel like I have reached a good place, but it is in my nature for wanting something a little more. The hardest part about turning 22 was talking to my dad. And I wished with all my might for one single thing. For one thing. Not roller blades or a pink dolphin to keep in the bath tub. I did not wish for extreme wealth nor did I wish for a brand new car. No what I wished for on my birthday was a cure for cancer. Was for my dad to get better so I could celebrate more birthdays with him. So we could laugh again, and he could beat me at cards. I longed  for his birthday speech about being another year older and thinking about where I want to go with life. That’s all I want.

But when it comes to Birthdays, it isn’t just about the wishes we make. It also involves cake. And I decided to make my own cake this year. My favorite candy in the world is Reese Peanut Butter Cups. Oh man. You can make me walk to the end of the earth by just waving one of those bad boys in front of my face. Ok. It might take 5 to make me walk to the end of the earth. But I love them a lot. So I decided to make a cake to represent this tasty creation.

Not bad for never taking a cake decorating class… right?! Haha. Okay it wasn’t the most beautiful cake in the world. That is why I usually stick to cupcakes. But it is pretty darn tasty!

It is chocolate cake with a peanut butter frosting in between the layers, a chocolate glaze frosting, and peanut butter frosting accents and writing.

Chocolate Cake

1 Cup Strong Brewed Coffee

1 3/4 Cup Flour

1 1/4 Teaspoon Baking Soda

1 Teaspoon Baking Powder

1/4 teaspoon salt

2/3 Cup Cocoa Powder

1/2 Cup (1 stick) Butter, softened

1 Cup Sugar

1 Cup Brown Sugar

4 Eggs

1 Teaspoon Vanilla Extract

1/2 Cup Milk

Ingredients

1. Preheat oven to 350 degrees F. Grease 2 9in circular cake pans. Brew coffee.

2. Mix the flour, baking soda, baking powder, cocoa powder and salt on wax paper or in a small bowl.

3. With the electric mixer, beat butter until smooth. Slowly add in the granulated sugar until butter and sugar is well mixed. Then beat in the brown sugar. Scrape bowl. Add eggs in one at a time, beating well after each addition. Add in the vanilla extract and milk.

4. Slowly add in the flour mixture and coffee, alternating between the 2. Be careful not to over beat.

5. Separate the batter equally between the two pans. Bake for 30-40 minutes, or until a toothpick inserted into the center comes out clean.

6. Let the cakes cool in the pan for about 10 minutes before putting them on a cooling rack.


Peanut Butter Frosting

1/3 cup butter, softened

2 1/2 cup confectioner’s sugar

1 cup peanut butter

2-4 tablespoons of milk (depending on what consistency you want)


Chocolate Frosting Glaze

2/3 cup butter, softened

2 3/4 cup confectioner’s sugar (feel free to add more to get the consistency you want)

1/2 cup cocoa powder

2/3 cup milk

Decorate as you please!


Then serve up and eat! Tastes just like a Reese Peanut Butter Cup. Enjoy!

Be A Kid Again

Life was a lot simpler back then. Back when the worst thing that happened that day was a scraped knee while pretending to be robotic dinosaurs. Or you got sand up your nose when you jumped off the swing and instead of having the graceful light of a feather landing you imagined, you end up doing a face-plant. Those were the simple days. Not much got me down then, and if I was a little bummed out, I just popped in The Lion King and all my worries were gone by the first note of the very first song of the movie. You know the song. Don’t look at me twiddling your thumbs and pretending you never tried to sing the beginning of “The Circle of Life.” We all have done it. But now, things always make me pause in the middle of the movie. Things like responsibilities. Doing a job that helps pay the bills. Making meals because I can no longer ask my mom to make me a PB&J. But sometimes you just have to give yourself permission to be a kid again. To  imagine the impossible. To slurp down that shake without worrying about your hips. Or in my case, make Shirley Temple Cupcakes.

I have a lot of fond memories of Shirley Temples in my childhood. If I wasn’t getting a Root Beer, I was getting a Shirley Temple. Since my parents went to the same restaurants frequently, they knew my order pretty well. They also knew I loved extra cherries in mine so I didn’t even have to ask for them. That was the best.  One of my favorite memories is when we were in a restaurant somewhere in Connecticut (I was like 6 or 7 at the time so excuse me for not remembering the name, the street, town, or even the exact State. I believe it was in Connecticut!) right before the dinner rush and they had a piano man. I was so captivated and my parents gave me money to put in his fish bowl (aka tip bowl). The piano man smiled at me and let me sit down next to him. He asked me what song he should play next. I was super excited! But I didn’t know any “adult” songs so I requested “Twinkle, Twinkle Little Star.” He smiled at me, and to my surprise, he did play Twinkle, Twinkle Little Star but in the most classiest way I have ever heard. I sat there for awhile, watching him play, and he would ask me if I liked a certain song. It was a wonderful evening. And yes, that evening I had a Shirley Temple so it was not just a random blurb about my childhood. It had some relevancy.

But tomorrow is my birthday and I will be turning 22. I know I shouldn’t be yearning for the days of my “youth” quite yet, but I am at the point where I still feel stuck between adulthood and being a kid. And sometimes, I just want to be a kid. I am not good at this whole adult thing. I long for the mysterious, nice piano man and a Shirley Temple.

Well, I don’t have a mysterious piano man, but I did have cherries in my baking cabinet. So I decided to make Shirley Temple Cupcakes. I had seen a few other bloggers try it out, but I had a different idea in mind. Of course, it is more like a really cherry cupcake… but I put umbrellas in them to make the illusion even stronger! Smart, huh?

Sorry for the blurriness. My Fault! Just so excited for them!


So now you can feel like a kid too when you just need one of those moments.

Shirley Temple Cupcakes (adapted from The Curvy Carrot)

1 1/2 cups Flour

1 teaspoon baking powder

1/2 teaspoon salt

1 stick (1/2 cup) butter, softened

1 cup sugar

2 eggs

1/2 cup cherry-flavored 7-up

1/2 teaspoon vanilla extract

1/2 teaspoon almond extract

4 tablespoons of maraschino cherry juice

red food dye

Instructions

1. Pre-heat oven to 350 degrees F. Line 12 muffin cups (Sorry, this recipe only makes 12 so share wisely!)

2. Mix the flour, baking powder, and salt in a small bowl or on wax paper.

3. With an electric mixer, beat the butter until smooth. Slowly add in the sugar. Add in eggs 1 at a time, beating well after each one. Put in the extract and cherry juice.

4. Alternate adding in the flour mixture with the 7-up.

5. I added just a drop of red food dye because I wanted a pink tint to my cupcake.

6. Fill liners with batter about 3/4ths of the way.

7. Bake for 20 minutes or until a toothpick inserted into the center comes out clean.

Very Cherry Frosting

6 maraschino cherries sliced into quarters

1/2 cup (1 stick) of butter, softened

6 cups confectioner’s sugar

1/2 teaspoon almond extract

6 tablespoons maraschino cherry juice

Instructions

1. With an electric mixer, beat butter until smooth.

2. Add in 4 cups of confectioner’s sugar 1 cup at a time.. Beating well after each time.

3. Add in the cherry juice and almond extract. Beat in the rest of the confectioner’s sugar.

4. If you do not like the consistency of the frosting, add in a little bit of whole milk (like a teaspoon at a time). To me, this was fine.

5. Add in the cherry slices. Beat on low so they are well dispersed.

6. Frost to your liking!

Garnish with a whole cherry and a drink umbrella!

In other news, tomorrow is my birthday (just in case you missed that above!). Also, I won over my first wedding couple! I will be making Portal Cupcakes for their wedding! I will be writing more about that soon. I am super excited!

So celebrate with me and make your own Shirley Temple Cakes!


Life is short. Life is precious. You plan and dream up this perfect life, way ahead of the game. way ahead of tomorrow… you think that there is enough time in the world. I can do that tomorrow. I can do that next summer. I can do that five years from now. Whatever it is, there is always something that we have put off. I know I am not the only one in the world who has felt this way. Who has said “Oh well. Tomorrow. I will do that tomorrow.” Some things are not that big deal (I just put off making a homemade pizza because I feel exhausted as my body adjusts to a new schedule). But other things, like telling someone you love them, cherish them… Doing that project that would totally make a loved one’s day… Why? Why do we wait? We just get so wrapped up in what is going on in our own mind that we believe we can deal with others tomorrow. The thing is… normally, you are not going to get any less busy. Something is always going to come up. If you think that way forever, something is always going to come between you and picking up the phone and calling your folks and saying “I love you.”

I’ve always tried not to have any regrets.  Believing everything happens for some sort of reason. Though you can imagine my complete shock with my dad was diagnosed with a terminal brain cancer back in November 2010. My dad. My hero. The guy that never missed a day of work even if he was up all night with a migraine. The man that did yard work after working a 60+ hour week.  Who even after he “retired,” was still working. Nothing seemed like it would keep him down. He was going to be healthy until he was a 101. And here he is at 66, with cancer. With a cancer, that has taken away most of his life. That has left him in a hospital bed with an IV in his neck and finding it hard some days to even open his eyes. It is hard not to have some sort of regrets in this situation. I was still in college when he was diagnosed. I went to school hours away from home. I was living in an apartment with my fiance. I wasn’t spending time with my folks. I wasn’t as concerned as I should have been when he first started complaining how a strange feeling in his left leg. He claimed he just strained something doing too much work in the garage. Knowing Dad, this did not seem unlikely. I should have offered to do something more that weekend. Who cares about my wisdom teeth… getting those out was not deadly. But that is the one thought in my mind. I should have done more. Should have visited more. Should have played more cards games. Should have… Should have. But right now, those should haves do nothing but make me sad. Right now, I need to be grateful for the times I did have. The times I did visit. The times we sat around the fire. The times we played cards. The time he and my mom stacked the deck so I would finally feel good about my card playing abilities. And I am grateful… and thankful… and so proud of having a father who loves me and supports me. Some people are not so lucky.

But sometimes, I just cannot be so optimistic. Sometimes, I feel like crawling in a corner and hiding under a blanket and wishing my life away. Sometimes I throw caution to the wind and eat an extremely bad but delicious brownie. I do not know what it is about chocolate, but for a brief moment, it helps me fight the darkness. It gives me a brief moment of calm. I created this brownie and I am going to enjoy it. Because life is meant to be enjoyed. Because life does not mean waiting for death. My dad would not want me sitting around feeling sorry for myself and everyone else.

So I baked. I baked because it helped clear my mind. I baked because I needed a pick-me-up. Because I needed to make something. Fix something. And know it would come out ok. Because I needed desperately something to go right. So I made these brownies. These delicious fudgy brownies. Perfect for brownie sundaes. Perfect for just munching on. Perfect for what I needed. And now when you are feeling like the world is against you, when you are feeling like you just cannot do anything right. Make these brownies. Let them help you clear your head and as you bite into the chocolatey bliss…let them give you a reason worth living.

Down-In-The-Dumps Brownie Bliss

1 Cup Butter, Melted

2 Cups Granulated Sugar

1 Cup Brown Sugar

2 Teaspoon Vanilla Extract

4 Eggs

1 1/2 Cup All Purpose Flour

3/4 Cup Cocoa Powder

1/2 teaspoon Salt

1 Cup Chocolate Chips

Directions

1. Preheat oven to 350 degrees F. Grease a 13×9 pan.

2. In a small bowl or on wax paper, mix the flour, cocoa powder and salt.

3. In a medium bowl, mix the sugar and brown sugar with the melted butter. Beat with an electric mixer until well mixed. Slowly add in the vanilla extract.

4. Beat in the eggs, 1 at a time. Mixing well after each egg.

5. Slowly add in the flour, cocoa powder and salt with the other ingredients. Have the mixer on low-speed.

6. Once mixed, add in the chocolate chips. Do not over-beat your batter.

7. Pour into pan. Bake for 35-40 minutes. Check with a toothpick to see if it is done. If no batter comes out with the toothpick, it is done.

Enjoy. Tastes delicious with Ice Cream. Just sayin’.

It is hard to believe that is already the end of August, and it is already starting to get a little cool here in Maine.  And since a trip to the Bahamas does not seem like it is in the near future, I decided to bring the Tropics to me and now…to you. Actually this was not planned at all — sometimes I wish I was that creative, but alas (yes I am bringing ‘alas’ back — at least for now!), I am not. It actually started when the love and I went to the local farmer’s market since we are all about supporting local yummies. And seriously, the things you get there seem 10x as yummy. And of course we always end up spending far more than we plan on spending, but it is all stuff I NEED. You understand right? At least nod and pretend you are on my side so the fiance does not take my spending privileges! Anyway, I am getting a little bit sidetracked. While we were looking at all the different stands, we came upon some jalapenos and other peppers.Well Kevin and I are polar opposites when it comes to peppers. I do not do spicy at all. If I did, this probably would not be a dessert blog but instead more of a foodie blog. I like sweet things, though. Sweet things are delicious. I could eat it all day and night. But I am sure you have figured that out already… Anyway, I feel bad that I keep Kevin from eating all the spicy food that he wants on a daily basis so I mentioned he should get some peppers. He asked what for and I mentioned I could actually make a jalapeno cupcake. This perked the interest of the guy running the stand and he gave us a couple free peppers so I could make the cupcake (yay for nice people!). He of course wanted one in return… but when I went to the farmer’s market again a week later, he was not there. I was very disappointed but I at least got an awesome cupcake recipe out of it.

My inspiration came from Betty Crocker’s Big Book of Cupcakes. I love it. It is like my Bible. I flip through it almost every day. And I really needed to learn to jump out of my comfort zone and Kevin is glad I did. I unfortunately did not get to try these at all… but the people that did have it really enjoyed it.  From what I heard, it does have a little zing to it after you eat it. So it will come back to haunt you. But I know there are some people out there that enjoy that (I am just not one of them!) But they sure did look good…and the frosting is delicious.

And not such a bad picture either. There might be something to this morning picture thing. Anyway my recipe is quite like the one in the Betty Crocker book but with a few adjustments.

Taste of the Tropics

Ingredients

2 3/4 Cup all-purpose flour

3 Teaspoons baking powder

1/2 teaspoon salt

3/4 cup shortening

1 2/3 cup granulated sugar

5 egg whites

1 1/2 teaspoon vanilla extract

3/4 cup mango-peach juice (no additives. mango puree and peach juice)

1/2 cup whole milk

1 -2 tablespoons finally chopped jalapeno (I put in a tablespoon but the fiance said it could use more)

Directions

1. Preheat oven to 350 degrees F. Place liners in 24 regular sized muffin cups.

2. On wax paperor in a medium sized mixing bowl,  mix together the flour, baking soda and salt.

3.  In an electric mixer, beat the shortening until smooth. Slowly add in the sugar.  Make sure to scrape the bowl occasionally.  The add egg whites one at a time. Make sure to mix well after each egg.  Add the vanilla and mango-peach juice and mix well. Then add in the flour and milk, alternating between the 2. Slowly adding a little bit at a time.

4. Then add in the jalapeno. Be careful not to over-beat.

5. Fill the cupcake liners about 1/2 way full.

6. Bake for around 20 minutes.

Coconut Buttercream Frosting

Ingredients

1/3 cup butter, softened

1 1/2 teaspoon vanilla extract

6 cup powdered sugar

4 tablespoons coconut milk

3 – 5 tablespoons whole milk

Garnish: Flaked Coconut and Chopped Fresh Mango

Directions

1. In the electric mixer, beat the butter until smooth. Add in the powdered sugar a little bit at a time. Beating well after each time.

2. Mix in the vanilla and coconut milk.

3. Add in milk until you have the consistency that you wish.

4. Frost cupcakes.

5.  Garnish with coconut and mango.

Keep cool or eat immediately. My fiance liked them after they had been in the fridge for a little bit. I frosted the cupcakes when they were still warm so the frosting became melty so we popped them in the fridge. He liked it that way.

Enjoy! Apparently it tastes a little tropical! I just have to take the people’s word for it. =)


The taste testing was a success and I am hopeful for the future. I have big dreams for A Dab of Frosting and hoping things will only getting better. One of the featured desserts was a Hot Fudge Sundae Cupcake recipe that I created. It is absolutely perfect for the Summer because it tastes just like a Hot Fudge Sundae without having to worry about the melty mess (well only a little bit when you are making it!). Another thing that is great about them is that they work well with parties. You can have a variety of toppings and kids/family/friends can decorate their own! You can have Sprinkles. Nuts. Chopped up Candy bits. Caramel syrup. Strawberry Syrup. Cherries. The possibilities are great! I was not as creative as I should have been at my taste testing – but it is definitely something to keep in mind for the future.

Now the recipe is not quite perfect yet. It is close but not how I want it. The first time I made it there was too much sugar and the cupcakes sort of imploded… just a little bit but also had a crunchy top. Though delicious… it was not exactly the texture I wanted. Second time, was a disaster and ended up in the trash. I am still a little sensitive about the subject…

Third time was pretty close to what I wanted. It was tasty and soft but it still does not have the texture I crave for this sort of cupcake. It works well with the fudgy ganache and the whipped topping… but I want perfection. So I am looking for an excuse to make them again. Anyone interested?

This is currently what I have for the recipe. Maybe you can experiment and let me know your results!

2 ½ Cups All Purpose Flour

3 teaspoons Baking Powder

¼ teaspoon Salt

½ cup butter, softened

½ cup vanilla ice cream, melted

1 ½ cups Sugar

1 teaspoon vanilla extract

3 eggs

1 ½ cups of Milk

Directions:

1. Preheat Oven to 350 degrees F. Line Cupcake Tray with 24 liners.

2. Mix the flour, baking powder and salt together.

3. Beat the softened butter until smooth and slowly add in the sugar. Once butter and sugar is mixed well, add in the ice cream.

4. Add vanilla extract.

5. Beat in eggs one at a time.

6. Slowly add in Flour mixture and alternate with the milk. So about 1/4 of the flour mixture and milk at a time.

7. Fill cupcake liners about 1/2 – 3/4 of the way. Bake for 25 minutes.

While cupcakes are cooling… make the ganache! Very easy.

Hot Fudge Ganache

1 1/2 cup Chocolate Chips

1/2 Heavy Cream

1. Heat heavy cream in a sauce pan until it is bubbling/simmering

2. Pour over chocolate chips and STIR! Stir like crazy. If you find that the chocolate chips do not melt, that’s fine. Just stick it in the microwave. Oh you should probably do this in a microwave safe bowl! Sorry! 15 seconds will do the trick.

3. If you find that it is too “soupy” to put on cupcakes, just let it cool for 15-20 minutes. It gets thicker as it sets.

4. Put on cupcakes.

Then go crazy with toppings! This is how mine came out:

Eat Immediately!

Courage Cheesecake

I am sorry. I am sorry with every ounce of my being and then some. I am sorry that there are no words to describe how sorry I am. So please forgive me? You do? Great! Because I did not get any real good pictures of the cheesecake. GASP! I know. It is terrible. It is so terrible that I should just go and make another cheesecake to make up for it. I will get on that. Probably next week. Yes definitely next week. And maybe the week after that. And the week after that. Until I can play the role of Mrs.Claus because I am so full of cheesecake. Ah, that sounds heavenly.

And no longer scary. I have to admit that I was absolutely petrified of making a cheesecake. I was reading horror stories of cracked, dry, flat, liquidy, flavorless cheesecakes… everywhere. It sounded like it was just a dream or a gift given only to the best bakers in thee world. No one else was allowed to enter the Pearly Gates of Cheesecake and I felt like a fool to even try. But I had to try. I had to throw caution to the wind and make a cheesecake. How could I call myself a baker if I could not even make one of my favorite desserts of all time? So I did it. I found this wonderful, wonderful, fantastic, amazing blog with a whole FAQ that seemed to be dedicated to me and it is perfect for anyone else out there that is afraid to take the plunge. Just do it. Jump into this world of creamy cheese and graham cracker crumbs. It is a beautiful place to land. Promise.

And I did it. I made a cheesecake. I was terrified. I was hovering over the stove like a dotting mom. I was scared when the timer went off after 35 minutes and it was still white! There was no golden brown top. It was white. Oh no. What was going on? Ok. Give it time. Another 5 minutes. Yeah. That should do it. But another 5 minutes went by and no change! Ok, ok. Maybe it was the water bath, it was just making things a little wonky. 10 minutes. That should do it. But it didn’t.

It was the scariest moment of my life. Yes, that is an exaggeration but it was pretty close to making the top 10 list. I was so afraid that this additional time was going to make it dry. I was so afraid that if I stopped then and there it was going to be liquidy. I was torn between perfection and giving up. But I kept going.

The total time for the cheesecake here in in-land Maine… was an 1 hour and 10 minutes. That is 35 minutes more than the time it said.

But I am glad I kept at it. Because it was the best tasting cheesecake I ever had. It was fine plain. It was even more fine with the homemade blueberry syrup. Or Strawberry Syrup. Or homemade whipped cream. It was so fine that I didn’t get any pictures of it because it was eaten up so quickly. And no one complained.

It was one of the happiest moments of my life. And it can be yours too. Go to Our Best Bites and worship them. Thank them for being alive. Thank them for taking their time to answer all the questions you could possibly have about cheesecake. And then you too can enjoy this amazing delicious creation…

The only one that made it into picture

Oh, and enjoy this cat in the box (yunno to make up for the lack of pictures…)

Mommy got this box just for me...I got business cards. Kitties got boxes to play in. It is a wonderful world. See, you can’t be mad now can you?

This weekend has been all about baking and it has definitely paid off! This weekend, I made my first order for A Dab of Frosting: more Tiramisu Cupcakes! (which had led to a second order which makes for a very happy Cassy). Now the last time I made Tiramisu cupcakes I had not really planned ahead and ended up throwing away 12 egg whites. It felt like such a waste… but I knew that Angel Food Cake required a lot of egg whites and I reminded my fiance that the next time I make Tiramisu Cupcakes that I need to make an Angel Food Cake at the same time. This ended up happening a lot quicker than I thought. I ended up following this Angel Food Cake Recipe, exactly. It had great reviews and I couldn’t find anything worth changing, and I am glad I didn’t. Now the one thing I thought would go great with the Angel Food Cake and Cheesecake would be the one thing that is in season in Maine right now: Blueberries!

I decided I was going to try my hand at making homemade blueberry syrup! Once again, my inspiration came from AllRecipes Blueberry Sauce but with some differences.

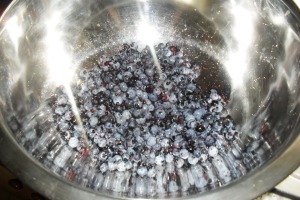
Measure out 2 cups of Blueberries and put them into a bowl. Pick out as many of the stems as possible. Luckily mine did not have that many!

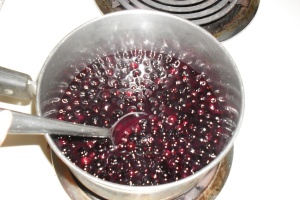
Once you do that, put the berries into a medium sauce pan and add in 1/4 cup cold water, 1/2 cup of orange juice (I used Oakhurst orange juice but you can use whatever suits your fancy), 1 teaspoon of freshly squeezed lemon, and 3/4 cup of sugar. Mix well over medium heat and bring to a boil.


In a separate small bowl, mix 3 tablespoons of corn starch and 1/4 cup of cold water. Once the blueberry mixture has come to a boil, add the cornstarch mixture and stir in until the blueberry mixture has become thick enough to coat the back of the spoon.

Now you can alter how thick you want it by adding in some water. I did. I added about another 1/4 of water because I wanted it a little bit more runny. Then add a teaspoon of vanilla extract and a 1/2 teaspoon of almond extract. And Wha-la!

Homemade Blueberry Syrup! And it tastes amazing! And it goes wonderfully with Angel Food Cake…

And tonight I am going to be trying it with the cheesecake I made… Post about that will have to wait for tomorrow!

But enjoy this yummy picture of it:

Mmmm breakfast food...Enjoy!

Ideas and Tiramisu…

A lot of changes are occurring for A Dab of Frosting — slowly it is starting to evolve into a small business and not just a hobby (because that is the dream to make your passion into a money making machine, right?). Right now it is not so much for profit but to build a fan base and also support my baking adventures so my other paycheck can go to… important stuff… like rent my horse. Who says I don’t have my priorities in order?

To get this feeling more professional, I have even started a Facebook page for it! Ok, well my fiance set it up. I’m not quite that tech savvy yet but I am working on it! Also, I am ordering business cards and making up brochures so I will be ready for our first Monthly Taste Testing party! Anyone who wants to swing by can enjoy Snickerdoodle Cupcakes, Hot Fudge Sundae Cupcakes and also the famous chocolate chip cookies that helped me fall in love with baking in the first place.

I have BIG dreams and I just know if I stay focus, they can come true!

Now on to the Tiramisu. I really wish I was better at taking pictures throughout my processes. I also wish I had a camera that could really capture the moments. But alas, I have neither. Tiramisu cupcakes are probably the hardest cupcakes I ever made (so far!). The whole process took about 5 hours altogether! So this is something you definitely do not want to do in one afternoon. I would start with the ladyfingers one day and then finish the rest the next morning if you wish to have it for dessert at a reasonable hour the next day. The custard takes about 6 hours in the fridge to set on top of the ladyfingers to get the best flavor. So patience on this one!

The idea to make Tiramisu cupcakes came from when a friend brought over Tiramisu Gelato (YUM) as a dessert for one of our evening gatherings. But then she mentioned how she never had actual Tiramisu! Which is just tragic… so I decided that her streak of being a tiramisu virgin must come to an end! And since I am on such a huge cupcake bender, I decided to try my luck at making them in cupcake form. I went to the internet in search of inspiration since a.) I never made Lady fingers b.) I have only had tiramisu once in my life and even though it was delicious enough to stick with me, it was not enough to replicate completely by memory and c.) I needed a list of ingredients.

and wha-la I found this amazing blog with a recipe for homemade ladyfingers and Tiramisu cupcakes and I highly recommend you check her out at The Cupcake Project. I made the ladyfingers just as she directed (which does involve separating an egg. How many people know how to separate an egg? if there are enough people who would like a little tutorial, I was thinking about doing one in my next blog post!). Now the problem is when you make these ladyfingers in regular cupcake size, and fill the cupcake liners about… a 1/4 up since you really want to layer on the custard…. you get about 30 cupcakes. Or at least I got 30 cupcakes. Either way, plan for A LOT of cupcakes.

Not even half of the ladyfingers! and I had to make my amazing fiance go out and buy me more cupcake liners because the ones I have ordered,  haven’t even come in yet (which is driving me a bit bonkers!).

Ladyfinger Recipe By Cupcake Project

4 eggs, separated

2 tbsp + 2/3 C white sugar

1 C all-purpose flour

1/2 tsp baking powder

Directions

Preheat oven to 400 F. Line 24 cupcake liners (at least). Depends how much ladyfinger to custard ratio you want.

Separate Eggs

Place egg whites in a bowl and beat on high until soft peaks start to form. (Soft Peaks means that the egg whites have just passed the frothy/bubbly state and that it holds some sort of form).

Slowly add 2 tablespoons of the sugar and continue beating until stiff and glossy.

In another bowl, beat egg yolks and remaining sugar.

Whip until thick and very pale in color. (you can do this with a fork — it is a bit of a work out!)

On wax paper or in a small bowl, mix together flour and baking powder.

Fold half the egg whites into the egg yolk mixture.

Add in flour, and then add the remaining egg whites.

Fill cupcake liners about 1/4 full. They will bake up to fill 1/2 the cupcake liner.

Bake for 8 minutes.

Tiramisu Cupcakes

12 egg yolks

1 1/2 C white sugar

1 1/3 C milk (I use whole milk)

2 1/2 C heavy cream

1 tsp vanilla extract

2 lb mascarpone cheese

2 C strong brewed coffee, room temperature (use good coffee. Kevin and I have discovered a love for Caribou Coffee!)

4 tbsp rum

1 tbsp unsweetened cocoa powder

a small amount of dark chocolate for chocolate curls (optional)

Directions

In a medium saucepan, whisk together egg yolks and sugar until well blended. Then whisk the milk and cook over medium heat. Make sure to stir constantly until the mixture boils (prepare to be stirring for awhile. It takes about 10-15 minutes to get the mixture to boil).

Boil gently for 1 minute, remove from heat, and allow to cool slightly. (When you can hold your hand over it and not feel it radiating any heat)

Cover tightly and chill in refrigerator 2 hours.

Remove from refrigerator and whisk in mascarpone (add slowly and whisk each time. About an 8oz container at a time) until smooth.  Set aside.

In a medium bowl, beat cream with vanilla until stiff peaks form. (You can also add some sugar to make it a little sweeter. I added 2 teaspoons of sugar to add a little sweetness). Set aside.

In a small bowl, combine coffee and rum.

Drizzle approximately 1 tbsp + 2 tsp of the coffee/rum mixture over each pre-baked ladyfinger.  Add it a little at a time and wait for it to absorb into the ladyfingers before adding more.

Spread the mascarpone mixture over the soaked ladyfingers.

Pipe or spread the whipped cream over the mascarpone.

Sprinkle with cocoa powder. (I used just my fingertips to sprinkle it on. Don’t over do it!)

Optionally, top with chocolate curls.  Make the chocolate curls using a vegetable peeler on a piece of chocolate.

Cover and refrigerate 4 to 6 hours, until set. (Definitely better if you wait for 6 hours… but if you really can’t wait, you can eat one after 4 hours…)


And wha-la! You have Tiramisu Cupcakes! Perfect for a lovely date night, a dinner party, or just because you are craving something coffee flavored and delicious.